Recently I broke, yet ANOTHER glass KitchenAid measuring bowl. Those things aren’t cheap! I considered giving up and just sticking with the silver metal bowls that come with the mixer, but I leave my KitchenAid out in the counter and I really love the sparkle of the glass.
I started hunting around online hoping for a sale….. and that’s when things went bad. First I found these gorgeous white, textured mixing bowls. *gasp* Sure, they were even more expensive than the glass bowls that I’ve been breaking…… but I just had to have one! So I stared searching for where I could buy the white bowl.
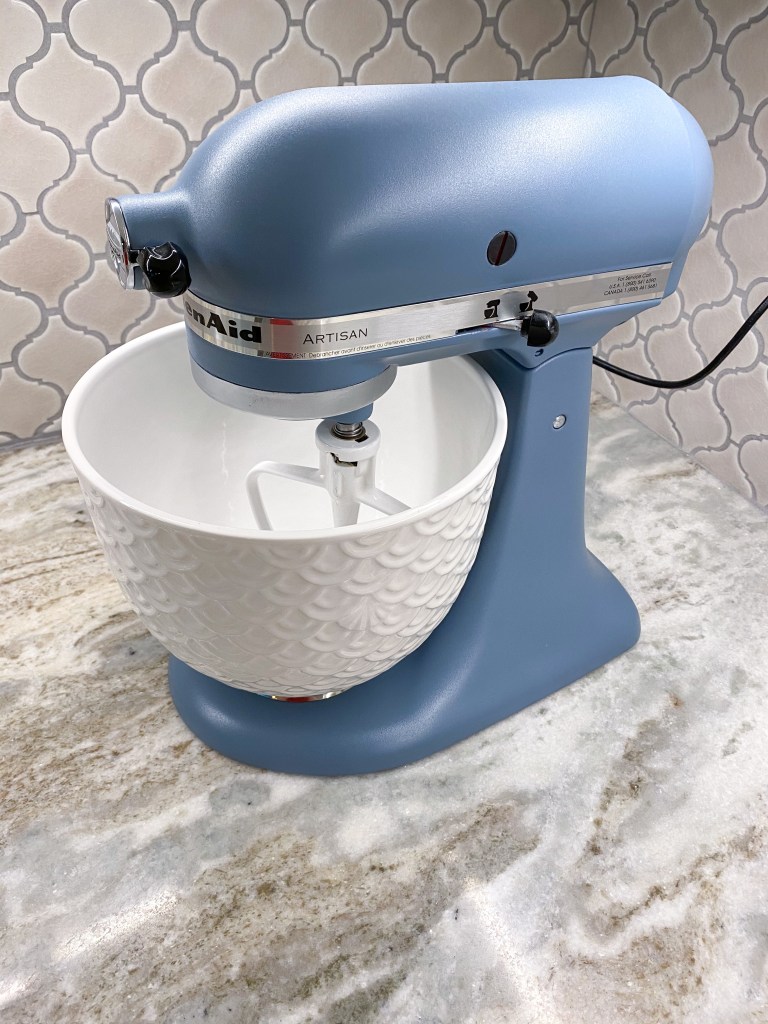
That’s when I found the white hobnail bowl was a special edition sold only with a special edition KitchenAid mixer. Of course! Oh, but that mixer… it was such a lovely shade of slate blue…. and I wanted it. BAD
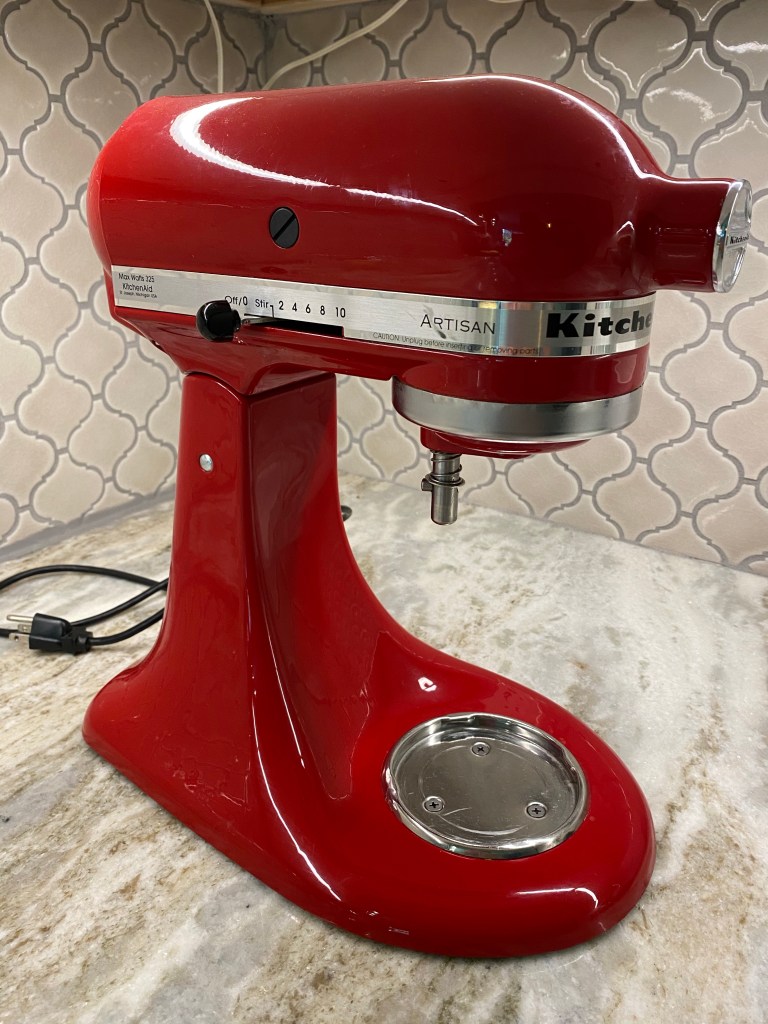
I tried to convince my husband that I needed this blue mixer, but he reminded me that I actually had not one, but TWO KitchenAid mixers already. The fact that they were red and not slate blue didn’t sway him in the least. I pouted half heartedly for a bit and then turned to Pinterest. I wondered if I could paint one of my red mixers.
Apparently, I wasn’t the only one who wanted to change the color of her KitchenAid mixer. Pinterest assured me that it could be done…. easy peasy.
Pinterest has led me wrong a time or two in the past, but I read several DIYs and really thought it was manageable. So…..
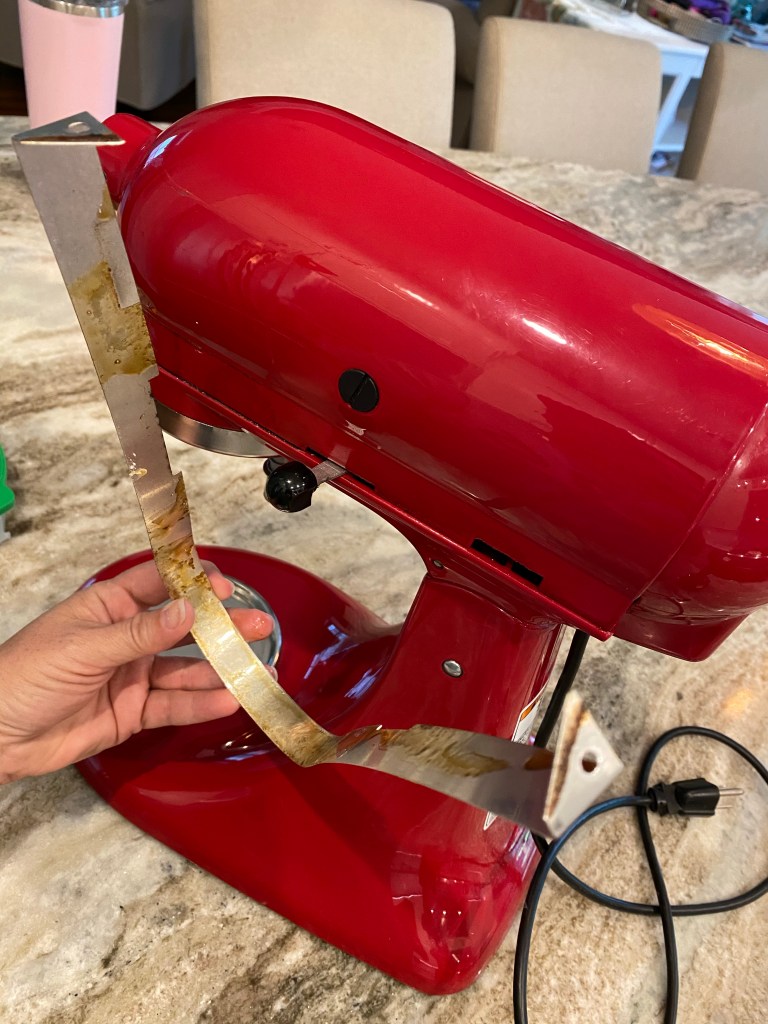
I started tearing my mixer apart. Eeewww! I thought I kept it really clean, but apparently gook can get into places you wouldn’t have expected. I used Dawn dish soap to clean the gook and Goo Gone to remove the adhesive after I took the warning sticker off the back of the stand.
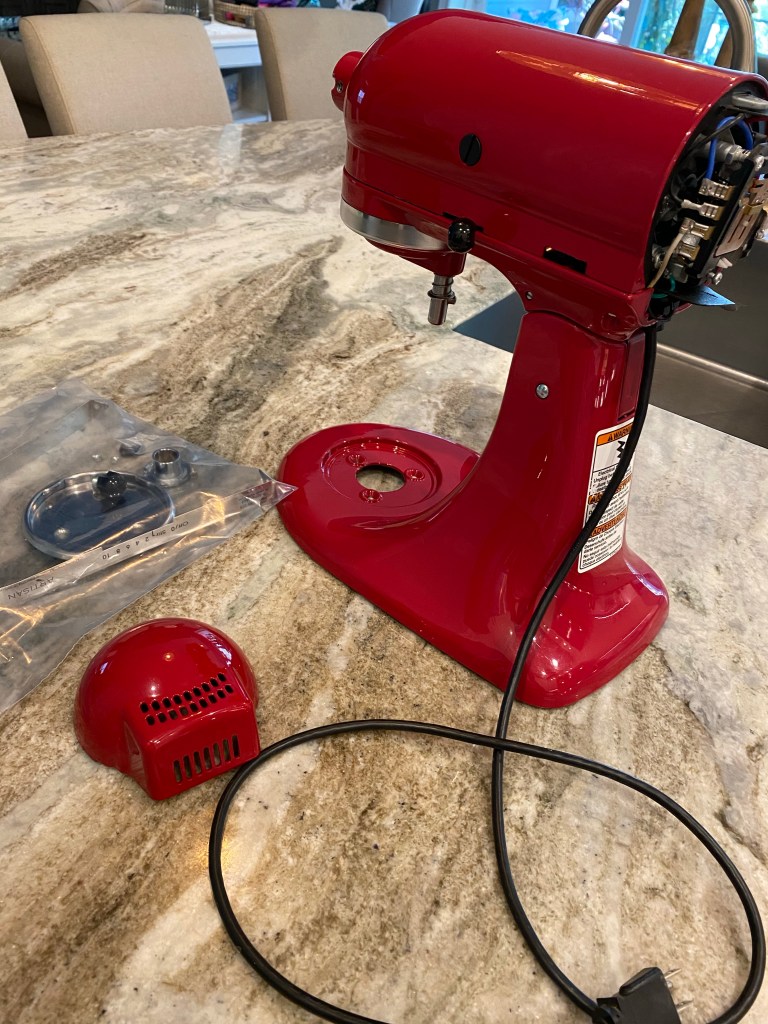
There really aren’t a lot of pieces to remove and it all came apart quite easily.
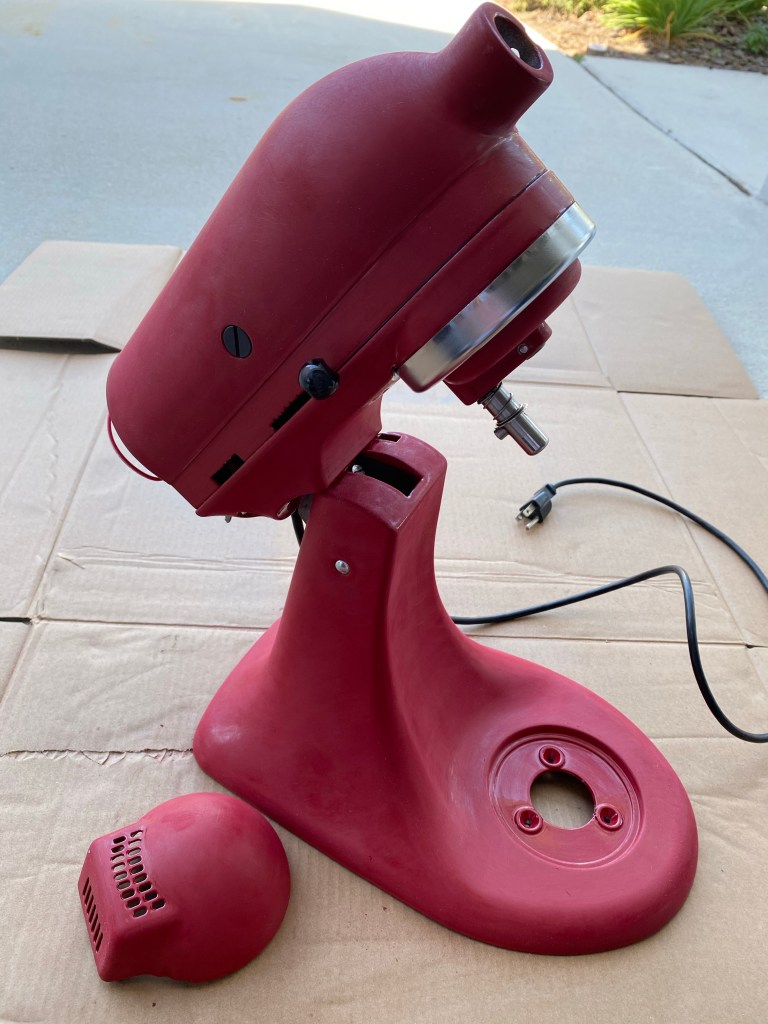
Using a piece of 220 grit sandpaper, I gently sanded the ‘shine’ off the mixer.
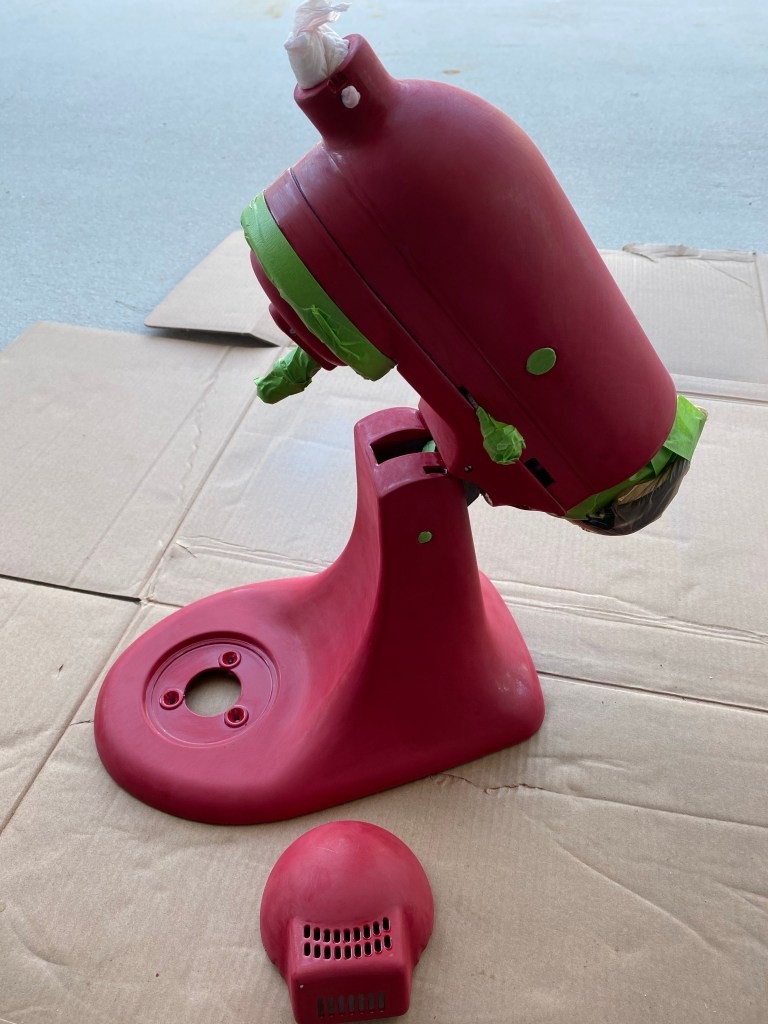
Next I wiped the mixer down and cleaned off all the paint dust. Then I taped all the bits that I didn’t want painted. This was one of the most challenging parts of the project! I tore small pieces of Frog Tape and covered the screw heads. Then I used a utility knife to trim the tape to fit.
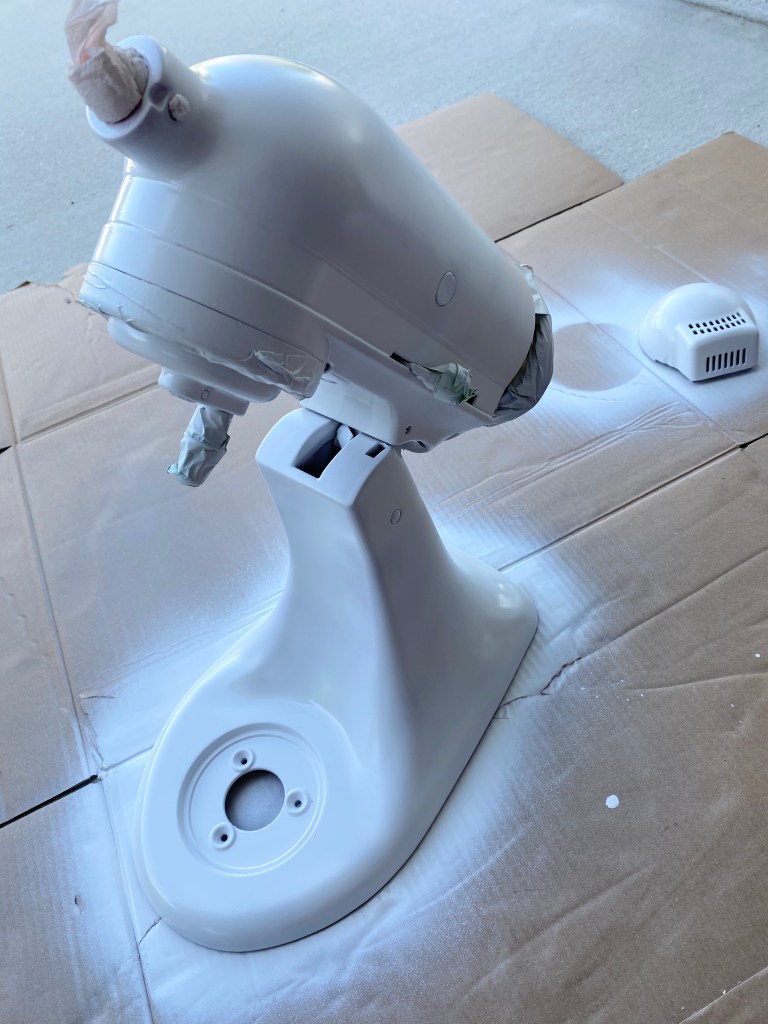
Some of the DIYs that I read suggested using a primer and others said that they didn’t use primer and it turned out fine. I figured that I should error on the side of overkill, since I use my mixer frequently and it is red and might be a hard color to cover.
The two coats of primer went on beautifully and dried smooth.
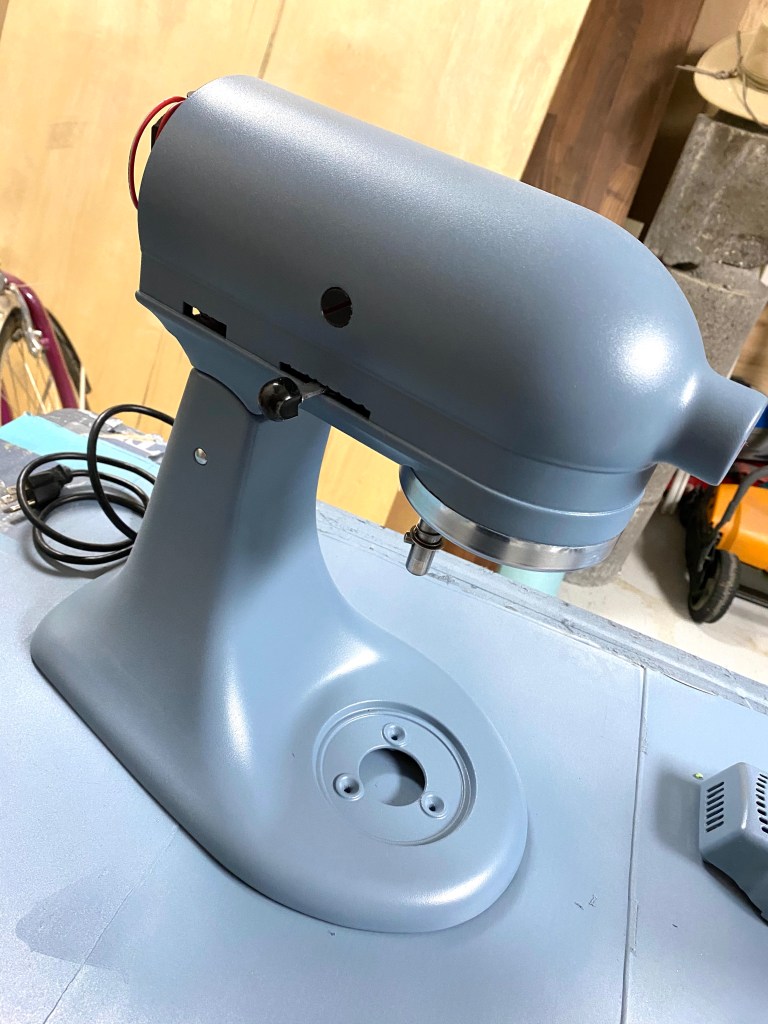
I chose Rustoleum 2X Slate Blue spray paint to mimic the color of the special edition mixer that started this whole project.
I was not as thrilled with the finished texture of the blue, so between coat one and two, I sanded it lightly. The third coat covered beautifully, but still had a slightly rough texture. I’m not sure what caused the slight texture, but honestly, I didn’t hate it. It was a consistent, slight texture. Almost like a ‘hammered’ texture. I was planning to paint the top coat with a clear satin coat, so I wasn’t too worried about the texture. If I’d been using a high gloss I think it might have been more of a concern… the shine might have been odd.

Ta Da! I am SO in love with the color and I just adore the white bowl. I’ll update this post in the future and let you know how the paint holds up.
